Achieving a flawless eye makeup look for a special occasion often feels like a daunting task, with many finding it challenging to get the blending just right or to prevent creasing. In fact, seasoned makeup artists often note that individuals lose as much as 90% of their perspective when applying makeup too closely to a mirror, leading to unexpected results once they step back. This common pitfall can make creating a polished, event-ready look seem impossible. Fortunately, mastering a stunning eye makeup look that lasts all day and night is entirely within reach, even for beginners.
This comprehensive guide dives deeper into the techniques demonstrated in the video above, offering an accessible, step-by-step approach to crafting a beautiful, warm-neutral eye makeup look perfect for weddings, galas, evening parties, or any event where you want to shine. We’ll explore essential product choices, crucial preparation steps, and expert blending tips to ensure your special occasion eye makeup is nothing short of spectacular.
Essential Tools and Products for Your Special Occasion Eye Makeup
Before diving into application, gathering the right tools and products is key to a seamless process. The video highlights a selection of trusted items, emphasizing minimal yet effective choices that simplify your routine without compromising on impact. Investing in quality products, even if they are few, makes a significant difference in the final outcome and longevity of your look.
Your Makeup Must-Haves:
- Clean Brushes: The foundation of any good eye makeup application begins with clean brushes. As mentioned in the video, having a set of clean brushes, like the BK Beauty N16 (priming), N14 (dome), and N13 (blending) brushes, ensures smooth application and prevents muddy colors.
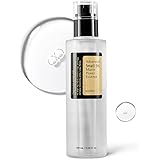
- Eyelid Primer/Base: To prevent creasing and enhance shadow vibrancy, an eyeshadow primer is indispensable. The MAC Paint Pot in Painterly is a cult favorite for its opaque, skin-toned coverage, creating a perfect blank canvas. Alternatively, a reliable concealer set with powder can serve the same purpose effectively.
- Setting Powder: A translucent or skin-toned loose setting powder, such as the Makeup by Mario powder in Fair Pink, is crucial for locking in your primer and ensuring your eyeshadow blends smoothly without clinging to any sticky areas.
- Neutral Matte Eyeshadow Palette: A versatile palette featuring a range of neutral brown matte eyeshadows is vital for creating depth and structure. The Makeup by Mario Master Matte Palette is a highly recommended choice, celebrated for its blendable shades suitable for various skin tones.
- Shimmer Topper: For that “special occasion pop,” a universally flattering shimmer or glitter topper is essential. Urban Decay’s Space Cowboy is highlighted as an excellent option, adding a touch of glamour without being overly dramatic.
- Eyeliners: Two types are ideal: one for tightlining (to define the lash line without harshness) and another for smudging and adding depth.
- False Lashes: To elevate your look, false lashes offer instant glam. The Ardell 420 lashes are praised for being universally flattering and easy to customize by cutting them in half to create two delicate half-lashes. Don’t forget lash glue, tweezers, and small scissors for application.
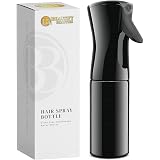
- Cleanup Essentials: Pointed Q-tips and micellar water or a gentle cleansing agent are indispensable for perfecting edges and cleaning up any fallout, ensuring a crisp finish.
Flawless Eye Makeup Application: A Step-by-Step Guide
Achieving a professional-looking eye makeup design involves meticulous steps that build upon each other. This detailed walkthrough will help you replicate the elegant warm-neutral look, focusing on precision and seamless blending.
Preparation is Paramount:
Before any color touches your lids, ensure your canvas is ready. Begin by gently wiping away any residual oil from your eyelids using a tissue or a makeup wipe. This crucial step prevents creasing and significantly extends the wear time of your eyeshadow. Your eyelids should feel dry to the touch, free from any skincare residue.
Next, always start with your eyebrows filled in and defined. As emphasized, your brows serve as the “framework” for your entire eye makeup, providing a clear starting and stopping point for your eyeshadow application. Well-groomed brows ensure a balanced and polished overall appearance.
Priming Your Lids for Perfection:
Applying an eyeshadow primer is a non-negotiable step for lasting wear. Using a brush like the BK Beauty N16, apply a thin layer of your chosen primer, such as MAC Painterly Paint Pot, across the entire eyelid area, extending up towards the brow bone. Pat the product onto the lid initially to ensure good adhesion, then gently blend it out so it seamlessly melts into your existing base makeup. Opt for an opaque, tinted primer over a clear one, as it provides a clean, even base that enhances eyeshadow payoff.
Immediately after applying your primer, set it with a light dusting of loose setting powder. Using a soft dome brush like the BK Beauty N14, gently press the powder onto your primed lid. This step locks the creamy primer in place, creating a smooth surface that prevents creasing, especially for those with oily eyelids, and ensures your shadows blend effortlessly.
Building Dimension with Transition Shades:
The transition shade is the secret to a professional-looking eye makeup design, creating a soft gradient and seamless blend between colors. Using a fluffy blending brush, such as the BK Beauty N13, select a matte eyeshadow shade that is about two to three shades deeper than your natural skin tone from your neutral palette. For instance, a light to medium brown often works beautifully for many complexions.
Start applying this shade in the outer corner of your crease, where your upper eyelid meets your brow bone. This area naturally provides the deepest color payoff, drawing the eye upwards and outwards for a lifted effect. Use small, controlled blending movements to deposit the initial color. Once the majority of the product is transferred, switch to a soft windshield wiper motion, sweeping the brush back and forth across your crease. This technique diffuses the color inward, creating a soft transition that gradually fades across the eyelid. Remember to keep your eyes open and relaxed during application to accurately gauge placement, especially if you have hooded eyes.
Deepening the Outer Corner:
To add more definition and drama, choose a matte shade that is approximately half a shade deeper than your initial transition color. With the same blending brush, apply this darker shade specifically to the outermost corner of your eye, focusing on that tight “V” shape where the upper and lower lash lines meet. Use light, controlled pressure and soft circular motions to build up the color gradually. Avoid pressing too hard or holding the brush too close to the bristles, as this can lead to harsh lines and excessive product application.
Concentrate this deeper shade primarily in the outer third of your eye, blending it about a quarter of the way inwards, stopping around your pupil. This strategic placement enhances the eye shape, making it appear more open and defined without closing it off. Patience is crucial here; layered application ensures a refined, blended finish rather than a patchy, intense look.
The Shimmer Pop and Final Touches:
Now for the glam! Take your shimmer topper, like Urban Decay Space Cowboy, and gently press it onto the center of your eyelid with your finger or a dense flat brush. This adds a beautiful, light-catching sparkle that truly elevates your special occasion eye makeup. The placement in the center creates dimension and opens up the eye.
To prevent pesky mascara smudges on your lower lash line, a clever trick involves using a small blending brush, like the Angie brush mentioned, and a tiny amount of loose setting powder. Lightly dust this powder along the tips of your bottom lashes. This acts as a barrier, effectively preventing mascara from transferring throughout the day, even in warm or windy conditions.
Finally, for a perfectly polished finish, clean off any excess product from your blending brush and perform one last, soft, all-over blend. This ensures all edges are seamless and diffused, making your eye makeup look cohesive and professionally applied. This small step makes a significant impact on the overall sophistication of the look.
Expert Tips for a Long-Lasting Look
- Lighting Matters: Always apply your makeup in natural lighting whenever possible. Overhead or dim bathroom lighting can distort colors and lead to over-application. If you’re at a hotel, position yourself near a window to utilize natural light for the most accurate results.
- Color Theory Basics: The warm-neutral tones of this eye makeup look beautifully complement outfits in black, gold, or champagne. If your special occasion attire leans towards cool tones, such as silver sequins or icy blues, consider a cool-toned eyeshadow palette for a more harmonious overall appearance.
- Perspective is Key: Periodically step back from your mirror to assess your progress. This broader perspective helps you catch any unevenness or areas needing more blending that might be missed when looking too closely.
- Customizing Lashes: If using false lashes, measure them against your eye and trim from the outer corner if necessary. Cutting the Ardell 420 lashes in half before application can create a more natural, subtle lift, making them easier to apply and universally flattering.
By following these detailed steps and incorporating these expert tips, you are well on your way to mastering a gorgeous special occasion eye makeup look. Embrace the process, take your time, and enjoy the confidence that comes with creating a stunning, long-lasting eye look yourself.